
Transforming glass bottles into stunning art pieces isn't just a craft—it's a way to breathe new life into everyday objects while unleashing your creativity.
If you want to transform glass bottles into art, start by gathering basic tools like glass cutters, sandpaper, and safety gear. Then, choose bottles with interesting shapes and colors to match your project.
Let's dive into the details and unleash your inner artist!
What You Need: Tools and Materials for Glass Bottle Art
Creating glass bottle art starts with having the right tools and materials to ensure safety and success.
To get started, you’ll need glass cutters, sandpaper, gloves, and safety goggles. Add paints, adhesives, or string lights to bring your vision to life.

Essential Tools and Safety Gear
The first rule of working with glass: safety first. Glass can be unpredictable, so always prioritize your protection. Here's what you'll need:
| Tool | Purpose |
|---|---|
| Glass Cutter | For clean cuts and shaping the glass. |
| Sandpaper (Grit 200-400) | Smoothing edges to avoid sharp spots. |
| Safety Gloves | To protect your hands from cuts. |
| Safety Goggles | Shield your eyes from tiny glass shards. |
| Mask | Helps avoid inhaling dust from sanding. |
Once your basics are ready, stock up on decorative materials: glass paints, twine, LED lights, or even decals.
How to Choose the Right Bottle for Your Project
Not all glass bottles are created equal! Picking the right one can make or break your masterpiece.
Choose bottles based on their size, shape, and transparency. Curvy bottles are perfect for vases, while tall, clear bottles work well for light displays.
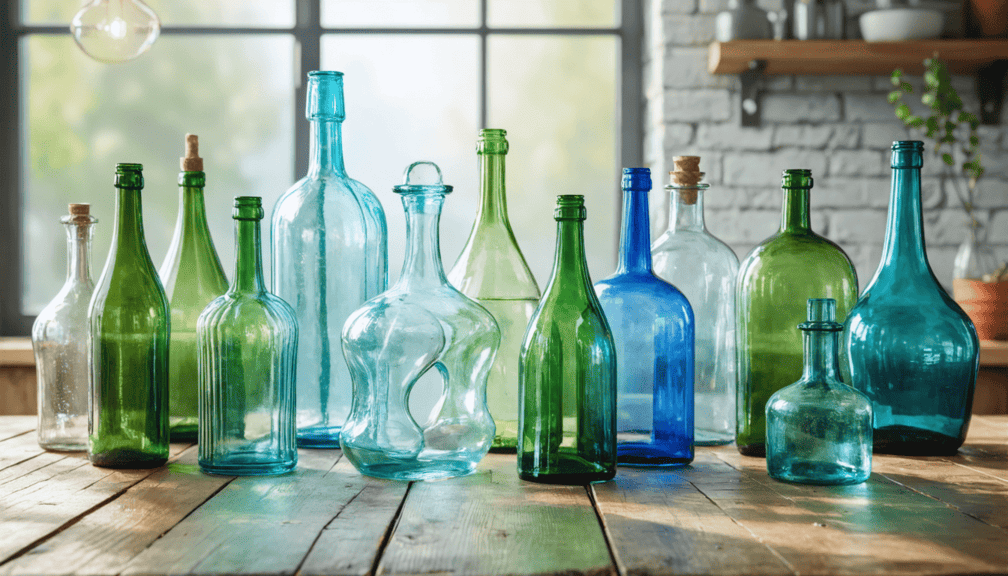
Factors to Consider When Selecting Bottles
- Shape: Look for interesting silhouettes. Curves, ridges, and unique necklines add personality to your art.
- Color: Transparent bottles work great for painting or lighting, while green or amber bottles bring a natural vibe.
- Size: Mini bottles are adorable for décor, while larger bottles make bold statement pieces.
- Condition: Check for cracks or chips. Even small imperfections can ruin the integrity of your work.
Step-by-Step Guide: Creating Your First Glass Bottle Masterpiece
Starting your first project can feel intimidating, but breaking it into simple, manageable steps can help you gain confidence and enjoy the process. Let’s dive in and create something beautiful together!
Begin by cutting and smoothing the bottle carefully, then let your creativity shine with paint, embellishments, or lights. Finally, seal your design to make it long-lasting.
A Beginner’s Step-by-Step Guide
1. Clean the Bottle Thoroughly
Start with a clean surface to ensure your design looks polished.
- Fill a sink or bucket with warm, soapy water.
- Submerge the bottle and let it soak for 15-20 minutes to loosen labels and glue.
- Use a sponge or scraper to remove the labels gently. For stubborn adhesive, try a few drops of olive oil or an adhesive remover.
- Rinse and dry the bottle completely before moving to the next step.
2. Mark Your Cut
Precision is key when cutting glass, so take your time setting up this step.
- Use masking tape to mark the line where you want to cut the bottle. The tape acts as both a guide and a stabilizer.
- For beginners, it’s best to keep the cut near the smooth, even sections of the bottle (like the middle) to avoid irregular edges.
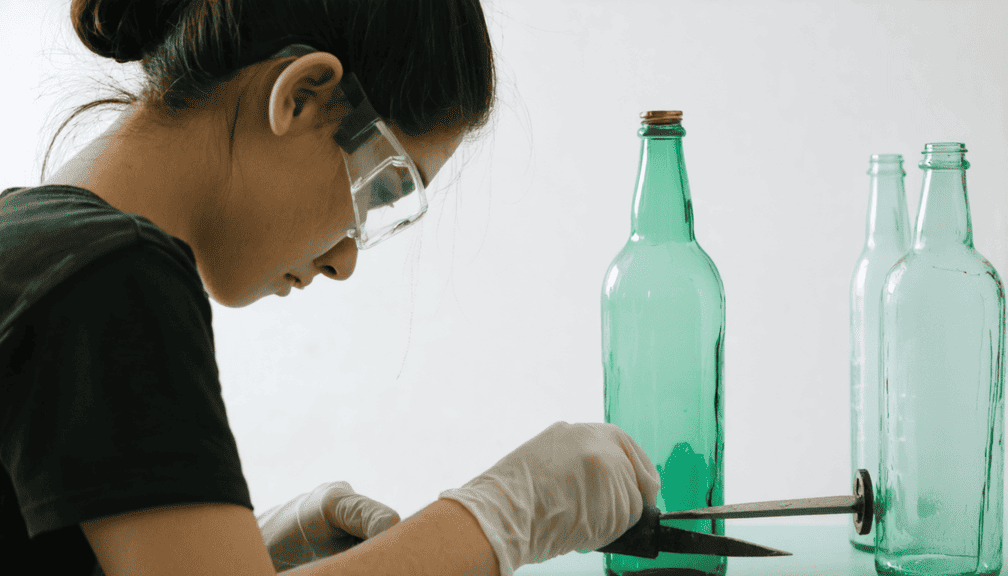
3. Cut the Bottle Safely
This step requires care and attention, so ensure you have all your safety gear on.
- Place the bottle on a sturdy, flat surface.
- Use a glass cutter to score along the marked line. Press down firmly but not too hard—aim for a single, clean line without going over it multiple times.
- To separate the glass, use the hot-and-cold water method:
- Boil water and prepare a bowl of ice water.
- Slowly pour boiling water along the scored line, then immediately submerge the bottle into the ice water.
- Repeat the process 2-3 times until the glass separates cleanly.
4. Smooth the Edges
Raw glass edges can be dangerously sharp, so smoothing them is essential.
- Use fine-grit sandpaper (200-400 grit) to gently sand the cut edges.
- Work in circular motions, keeping consistent pressure until the edges feel smooth to the touch.
- If you have access to a rotary tool, it can speed up this process.
5. Decorate Your Masterpiece
This is where your creativity comes to life!
- Paint: Use glass paints for a vibrant, long-lasting finish. Stencils can help with intricate designs.
- Embellishments: Add texture with twine, beads, or small charms. Hot glue works well for securing decorations.
- Lights: Insert LED fairy lights into clear or frosted bottles for a magical glow.
6. Seal and Protect
To keep your design looking fresh, sealing it is a must.
- Use a clear spray sealant designed for glass. Hold the spray can 12 inches away and apply thin, even layers.
- Allow the sealant to dry for at least 24 hours before handling the bottle.
Pro Tip: If your first try isn’t perfect, don’t worry! Practicing on a few extra bottles will help you refine your technique.
By following these steps, you’ll create a glass bottle masterpiece that’s as stunning as it is personal. Take your time, enjoy the process, and let your imagination guide you.
What Else Can You Do? Creative Ideas Beyond Basic Designs
When it comes to glass bottle art, the possibilities are endless. Let your imagination run wild!
Try creating bottle planters, wind chimes, or even chandeliers. Incorporate natural elements like driftwood or pebbles for a rustic look.

Inspiration for Advanced Projects
- Bottle Terrariums: Fill bottles with tiny plants, soil, and moss for a self-contained garden.
- Light Displays: Insert fairy lights into clear bottles for magical décor.
- Chic Chandeliers: Cluster bottles with lights for a unique centerpiece.
- Wind Chimes: Combine glass pieces with beads and metal charms to create soothing sounds.
Experimentation is key—don’t be afraid to mix materials or try new techniques!
Conclusion
Glass bottle art is more than a craft—it's a chance to create beauty while reducing waste. With the right tools, techniques, and creativity, your bottle art can shine!


